Overview
- Connect Accord to Hubspot
- Configure the Accord Widget in HubSpot
- Create Custom Properties
- Set up Automatic Accord Creation Rules
- Set up Validation Rules
1. Connect Accord to HubSpot
To setup the HubSpot integration you must first connect your Accord workspace to HubSpot. You must be an Accord Admin and a HubSpot Admin.
Connect Your Workspace
- Navigate to the Profile > Settings > CRM or visit [CompanyName].inaccord.com/crm-settings
- Click Connect HubSpot and follow the authentication flow

Check out Authenticating into HubSpot for more details.
Individual Users
Each individual user in your workspace will also have to connect to their personal HubSpot account - this only takes a second! Without this connection, they will not have access to certain features in Accord.
Simply go to Settings > Profile > click Connect

NOTE: All Solution Providers must have App Marketplace Access permissions in order to connect Accord with their HubSpot account. This access is granted in Hubspot.
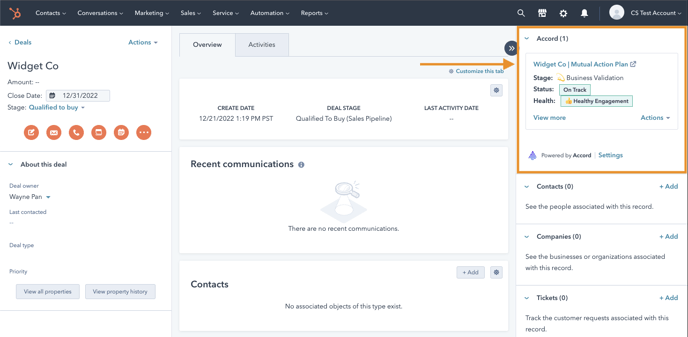
2. Configure the Accord Widget in HubSpot
The second half of the setup involves installing the Accord app as a widget within HubSpot Deals.
To do this:
- Navigate to Settings > Objects > Deals > Record Customization > Customize the right sidebar > Default view
- Look for Accord and drag it to the top of the list of cards. If you don't see Accord, click Add card, and add Accord to your list of cards.
If you use "Team views" have a unique view for each team, add the Accord card to the necessary team views.
3. Create Custom Properties
Now that your Accord and HubSpot workspaces are connected, you can create new properties in your HubSpot Deals to intake data from their connected Accords.
Doing so will allow you to run reports and create dashboards in HubSpot with key metrics from Accord taken into consideration (e.g. Execution Score, Progress, Number of Customers Invited).
To do so, follow the instructions in this helpful article.
4. Set up Automatic Accord Creation Rules
One of the most effective ways to reinforce your repeatable process is by automatically creating an Accord whenever a HubSpot Deal meets certain criteria in HubSpot.
For example, you can set up an Automatic Accord Creation rule that creates an Accord whenever a Deal:
- Belong to a certain Deal Pipeline, AND
- Reaches a certain Deal Stage

5. Set Up Stage Progression Rules
In order to make your repeatable process truly unavoidable, you can create a stage progression validation rule. Doing this will make it so that deals cannot progress without certain requirements being met in Accord.
For example, you can set up a validation rule so that a HubSpot Deal cannot move past a certain Deal Stage without:
- Having at least 1 external stakeholder invited to the Accord, AND
- Completing a certain step in the Accord
For more information on setting up stage progression validation rules, refer to this helpful article.